.. _setup_serial_cfg:
Configure Serial Connection
---------------------------
During early development, it is strongly recommended to establish a connection to the DevKit via the serial interface, whether the system is used in a standalone configuration or as a PCIe device in a host system.
In a standalone setup, the serial connection provides reliable access to the DevKit regardless of how it acquires an IP address. This ensures that developers retain control of the system for configuration, monitoring, and recovery tasks even if network connectivity is unavailable or misconfigured.
In a PCIe setup, the serial interface offers direct access to the PCIe card’s shell and debug consoles during bring-up. This is particularly useful for low-level control and troubleshooting when the host system or PCIe link is not yet fully operational.
The serial interface is intended primarily for development and bring-up. Once the system has been fully configured and deployed, ongoing operation generally does not require a serial connection.
Depending on the operating system of the developer’s computer, different methods are available for connecting to the DevKit through the serial interface.
.. tabs::
.. tab:: Hardware Setup
.. raw:: html
MLSoC Connectors
Modalix Early Access Kit Connectors
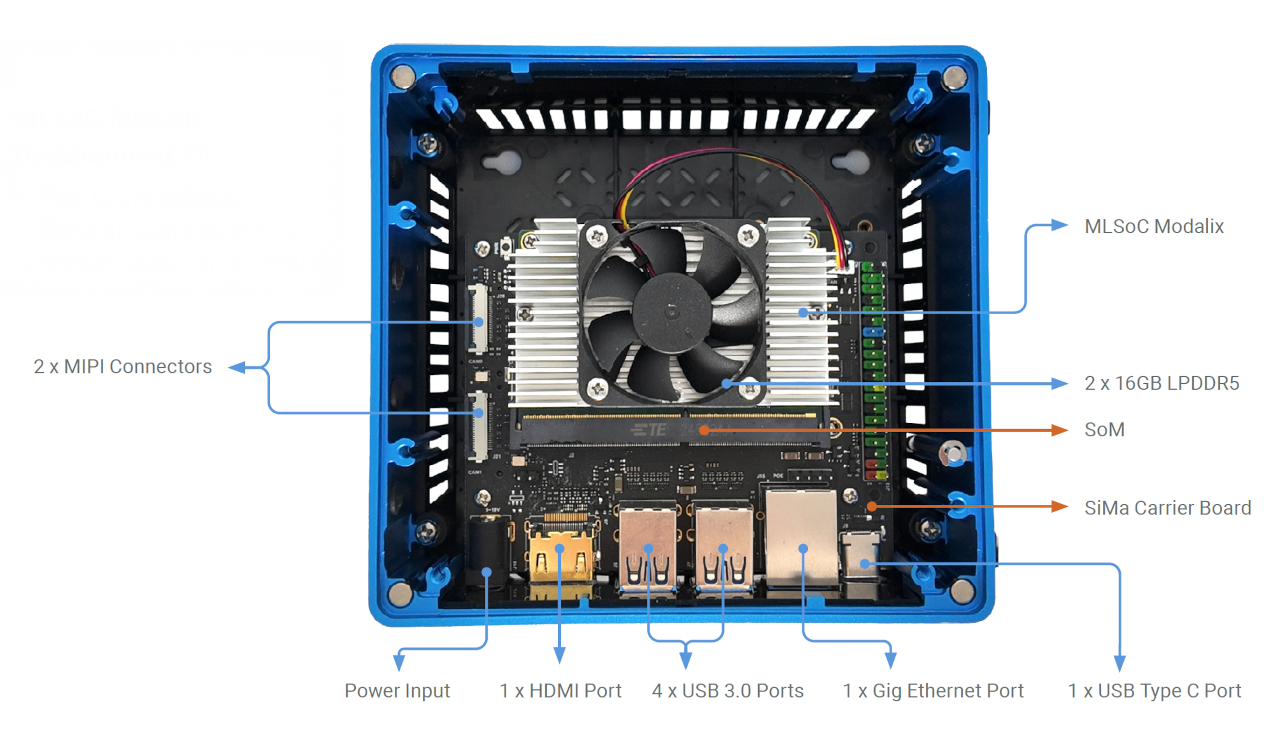
Modalix DevKit Connectors
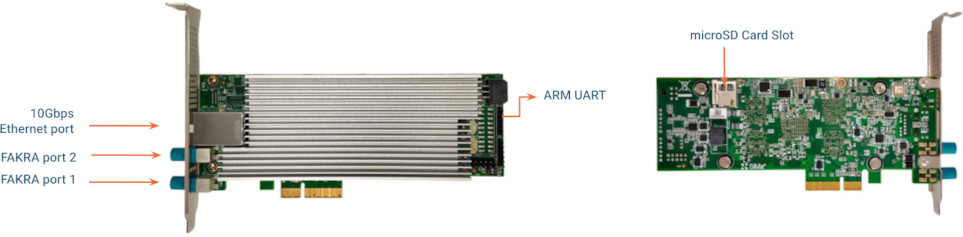
Modalix EA PCIe Card Connectors
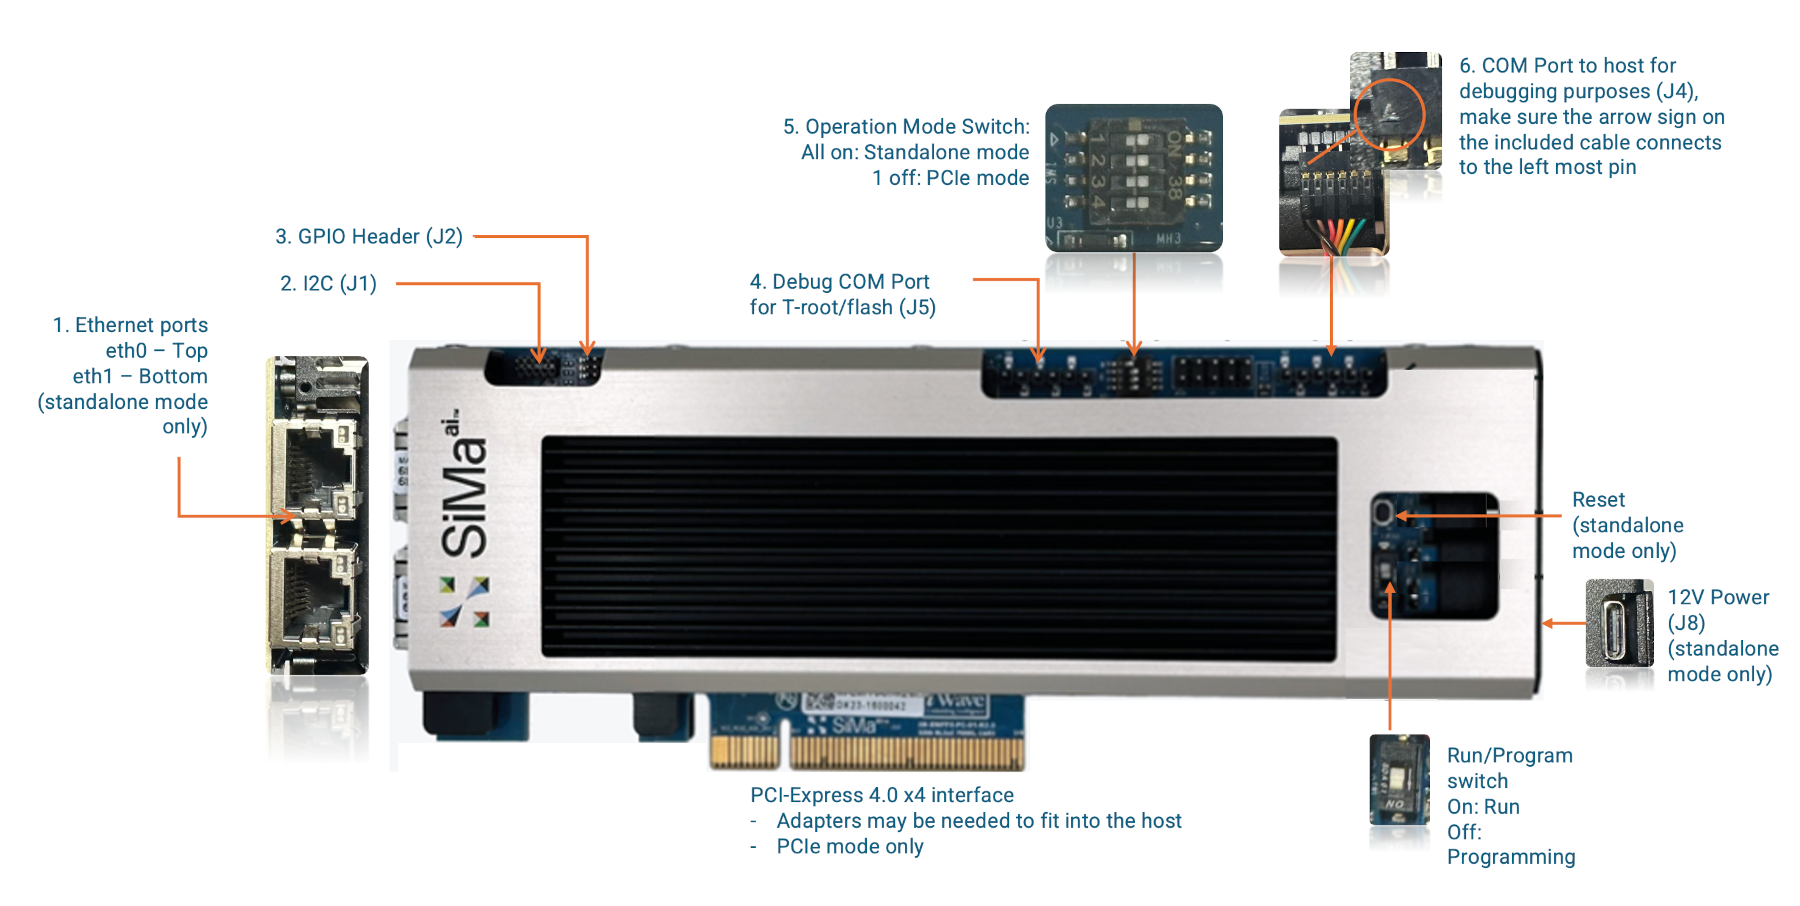
On the MLSoC DevKit, Make sure the Operation Mode Switch, Run/Program Switch are set according to the diagram above then power on the DevKit.
Use the included serial cable to connect the DevKit to your computer:
- One end connects to the DevKit's serial port.
- On the MLSoC DevKit, ensure the triangle mark on the flat connector aligns with the leftmost pin on the DevKit.
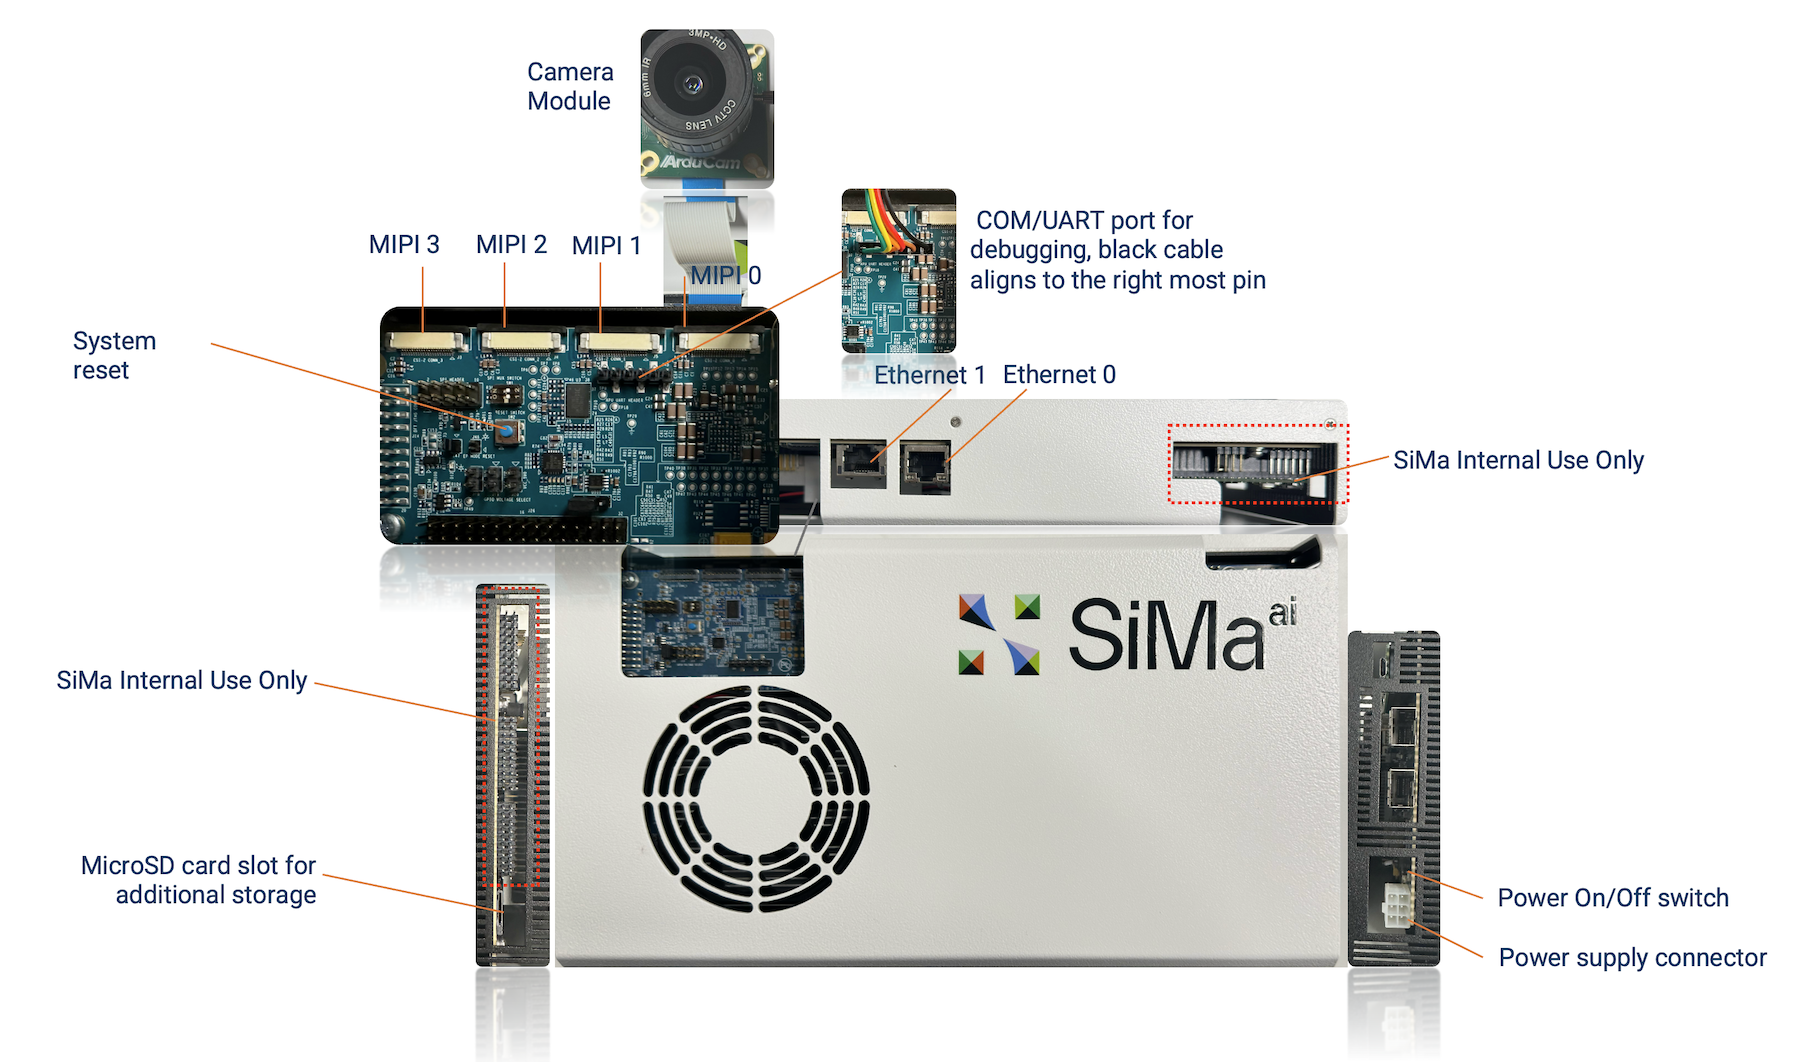
- On the Modalix Early Access Kit, ensure the triangle mark on the flat connector aligns with the rightmost pin on the DevKit.
- On the Modalix DevKit, use the provided USB-A to USB-C cable to connect to the DevKit’s **UART** port, as labeled on the enclosure.
- On the Modalix EA PCIe card, use the provided USB-A to UART cable to connect to the DevKit's ARM UART port, as described in the image above.
- The other end connects to the computer's **USB Type-A** port, use a USB Hub if necessary.
.. tab:: Windows
To connect to the DevKit via a serial terminal on **Windows**, follow these steps:
1. Identify the COM Port:
- Open **Device Manager** → Expand **Ports (COM & LPT)**.
- Look for an entry like **USB Serial Port (COMx)**.
2. **Install and Open a Serial Terminal**:
- Use `PuTTY `_ or **Tera Term**.
- Set the connection type to **Serial**.
- Enter the correct **COM Port** (e.g., ``COM3``).
- Set **Baud Rate** to ``115200``.
3. Click **Open** to start the connection.
.. tab:: MacOS & Linux Desktop
.. include:: ../blocks/install_sima_cli.rst
Use `sima-cli serial` command on Mac and Linux to connect to the serial port of the SiMa hardware.
.. code-block:: console
sima-cli serial
This command will install necessary dependencies on your computer to access serial port. To exit the serial terminal, press Ctrl + A then Ctrl + X.
On some earlier firmware versions, the system may use a different baud rate for the serial console. If you see garbled output in the terminal, it's likely due to a mismatched baud rate. Try specifying a higher rate:
.. code-block:: console
sima-cli serial -b 921600
Once prompted to log in to the serial port console, use the default **username** ``sima`` and **password** ``edgeai``.