SiMa Software has moved to Palette Neat, the new AI agentic-driven application
development framework. For the latest documentation, please visit
developer.sima.ai.
This guide explains how to convert an existing SiMa.ai Yocto-based DevKit to the new eLxr runtime environment, and how to revert back to Yocto when needed.
Note
The eLxr platform is available starting from SDK 2.0.0 and later on the Modalix DevKit.
Converting to eLxr requires a tRoot update and eMMC reflash facilitated by Update with Net Boot.
The eLxr platform replaces the legacy Yocto environment as the new default runtime for SiMa.ai DevKits.
It offers significant benefits for developers:
Simplified updates — unified root file system layout with larger root file system.
Standard package manager — Debian-based foundation with persistent package management.
To confirm your current environment before migrating, follow the quick check below.
To determine which firmware the DevKit is currently running, connect via serial or SSH and run:
cat/etc/buildinfo|grepDISTRO
You should see either:
DISTRO = poky
or
DISTRO = eLxr
If you see poky, follow the steps below to migrate.
Step 1. Update to the Latest tRoot
Before proceeding with the eLxr conversion, update the DevKit to the
latest tRoot image.
This update is required to ensure that the tRoot (trusted root) is
compatible with eLxr.
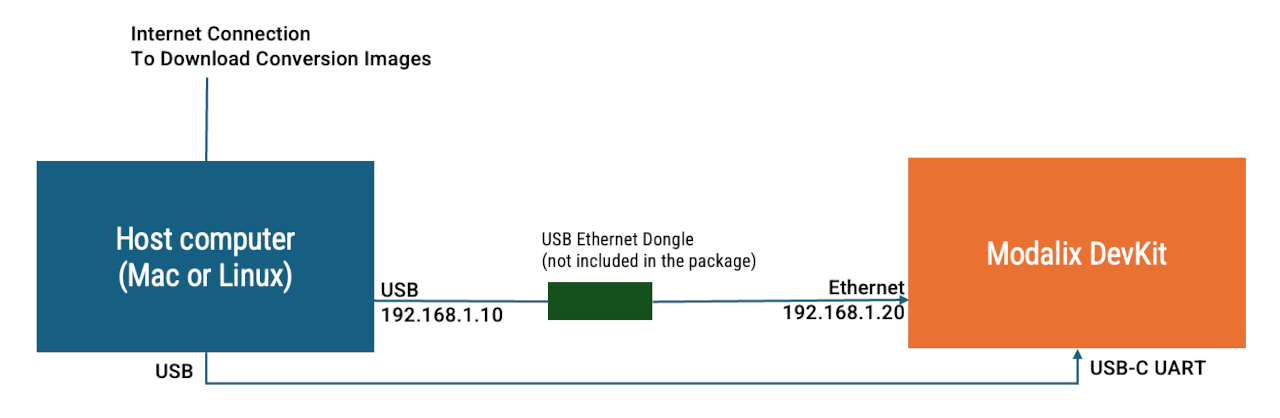
With the host on static IP 192.168.1.10 and the DevKit reachable at
192.168.1.20 (see Configure DevKit Network):
After the update completes successfully, power cycle the DevKit
to apply the changes.
Step 2. Netboot the eLxr Image and Flash the eMMC
The remainder of the conversion uses the standard TFTP netboot + flash
procedure documented in
Update with Net Boot.
Follow that procedure with the eLxr-specific values below:
Step 2 (Start TFTP server): use --boardtypemodalix--fwtypeelxr-v2.0.0.
Step 3 (Configure U-Boot): set cpio_name=simaai-image-palette-modalix.cpio.gz
in addition to boot_targets=net before running boot.
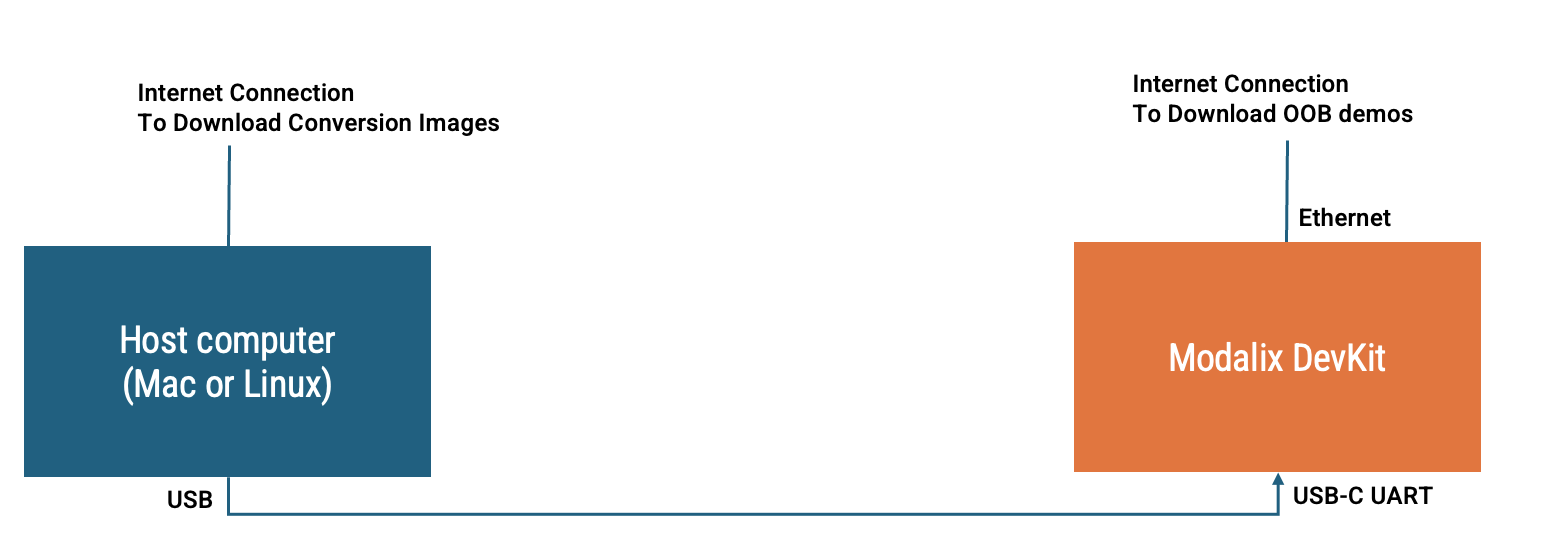
Your DevKit running version 1.7 may be preloaded with a 1.7-compatible
OOB (out-of-the-box) demo. After converting the DevKit to version 2.0
with eLxr, you can upgrade the OOB demo by following the instructions
below.
To proceed, connect your DevKit to the Internet and access it using
either an SSH session or the serial console.
During the install script, if you already have a previous version of the OOB
experience installed, you will be prompted to confirm whether you want to
upgrade the demo. Type Yes to confirm.
To install the assets, you must authorize the installation. The install script
will print a code and an authorization URL during the installation command. Open a browser, navigate to the
auth.sima.ai link, and log in with your developer portal credentials.
Confirm the code printed in your terminal to authorize the installation.
Revert to Yocto (Optional)
To switch back to Yocto, follow
Update with Net Boot
again with --fwtypeyocto. The cpio_name U-Boot variable is
not required for Yocto targets — only setenvboot_targetsnet,
saveenv, boot.
Note
There is no minimum tRoot version requirement when converting
back to Yocto, so Step 1 above can be skipped.
If NFS-related error messages appear on the serial console after
converting to eLxr, they can be safely ignored.

 modalix:~$ cd /tmp && curl -O https://tools.modalix.info/setup-oob.sh && bash setup-oob.sh