Development Kit 2 Contents
The following is a list of contents that should be in the package you received. Make sure you have all the components and if something is missing, please contact your salesperson at SiMa.ai:
MLSoC Developer Board
USB Type C cable
USB Power Brick
Ethernet Cable
USB to 6 pin USB FTDI cable
2 1000Base-T module for SFP
32GB SDCard
Booting up the MLSoC Developer Board
In this section we will set up the host system to communicate with the MLSoC Developer Board using the appropriate serial port. The board can be set up in standalone or PCIe mode.
Development Kit 2 in Standalone Mode
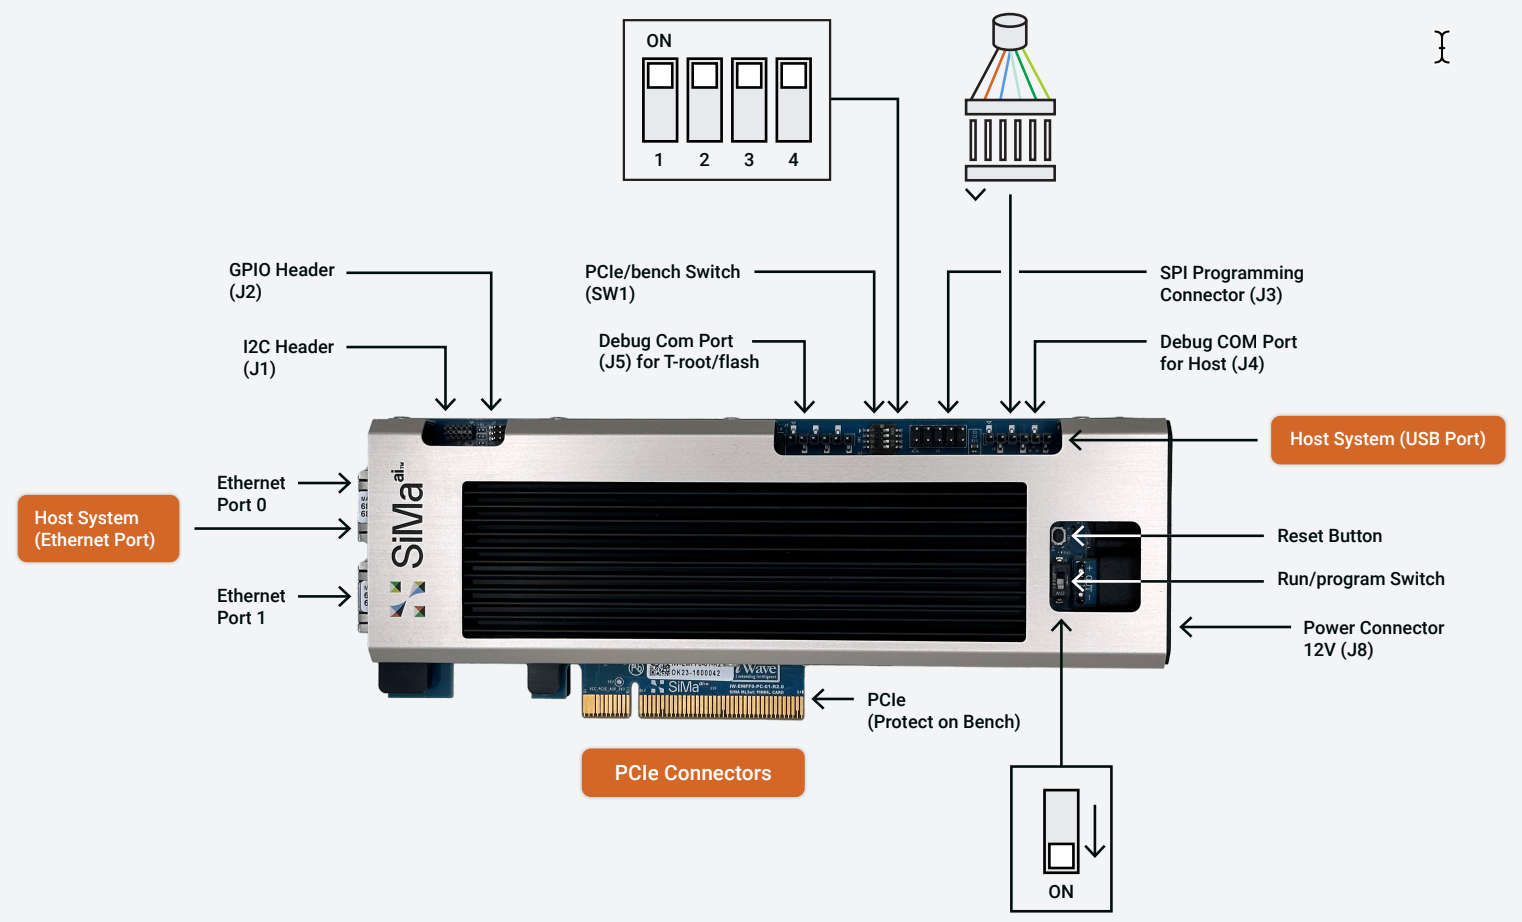
To set up the board in standalone mode, make sure all four dip switches are in ON position as shown in the image below.
Development Kit 2 in PCIe Mode
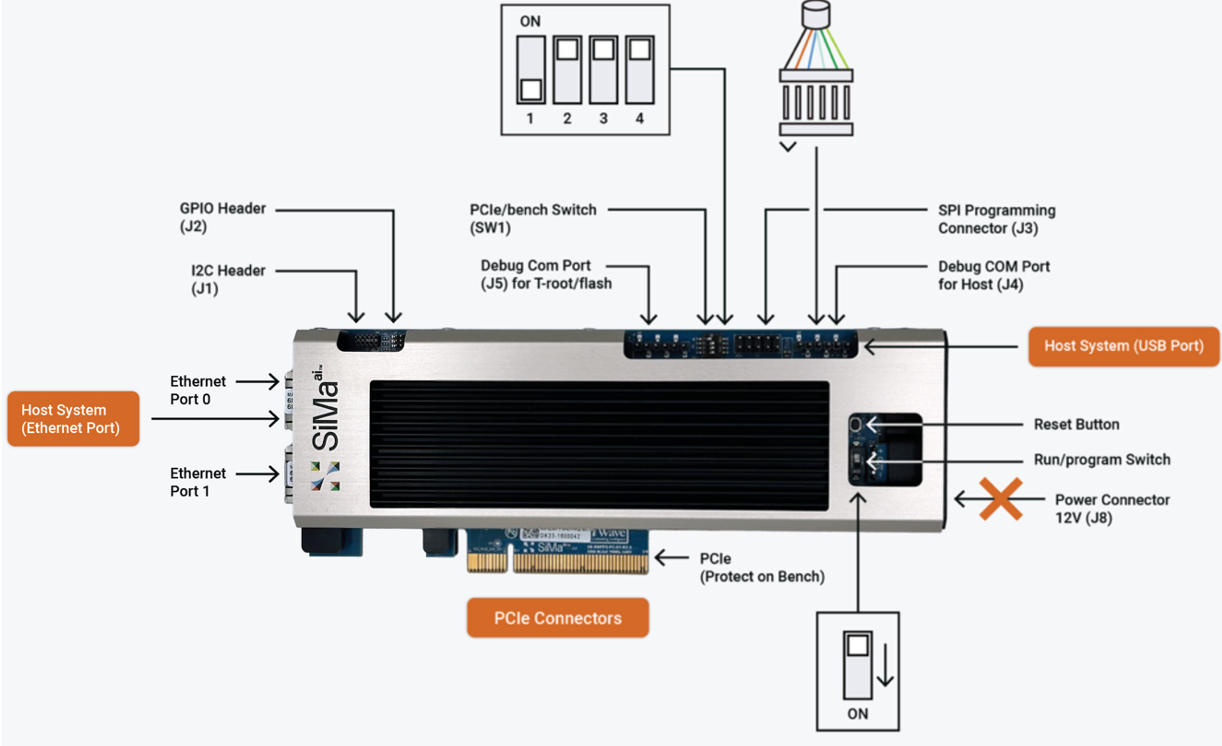
To set up the board in PCIe mode, make sure the first dip switch is in OFF position and dip switches #2, #3, and #4 are in ON position as shown in the image below.
Steps
Power up the board by connecting one end of the 12V Type-C to Type C data cable (power cable) from the power brick to 12V power connector and the other end to the AC outlet.
Connect the 6-PIN connector to the UART port and the other end to your host machine.
By using a serial device connector like
minicomin Linux and macOS orTera Termin Windows, connect to the board USB using a speed of 115200 baud rate, 8 data bits, no parity bits, 1 stop bit and no flow control. See Initial Board Setup for details.You should see the following:
sima-user@sima-user-machine:~$ sudo minicom -D /dev/ttyUSB2 -b 115200, 8n1 -w
    Welcome to minicom 2.8

    OPTIONS: I18n
    Port /dev/ttyUSB2, 15:56:28

    Press CTRL-A Z for help on special keys


    davinci login:
Log in with username
simaand passwordedgeai:davinci:~$
Note
- We suggest that you change the password.
Run
passwdand pressEnter.Enter
edgeaias the old default password followed by your new password.Remember to note down your new password.